Wednesday, January 23, 2019

Oil Lamp Chandelier

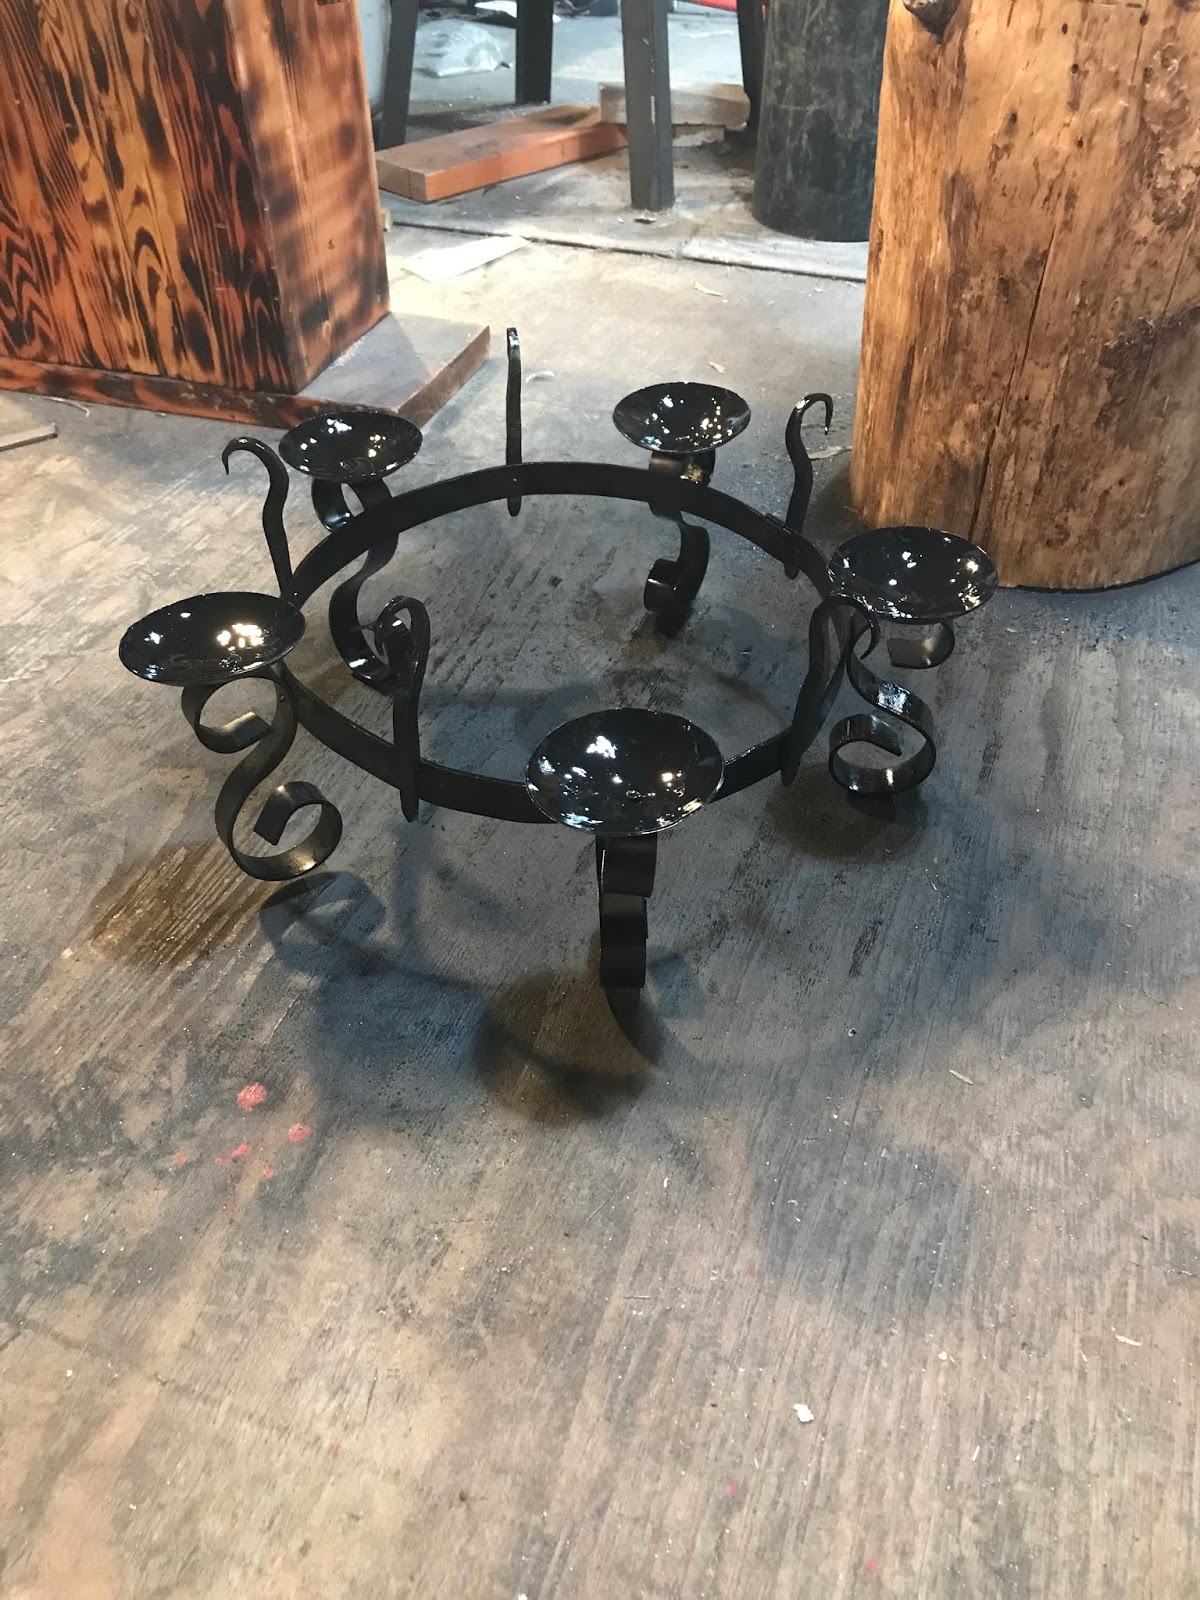
Steel Oil Lamp Chandelier


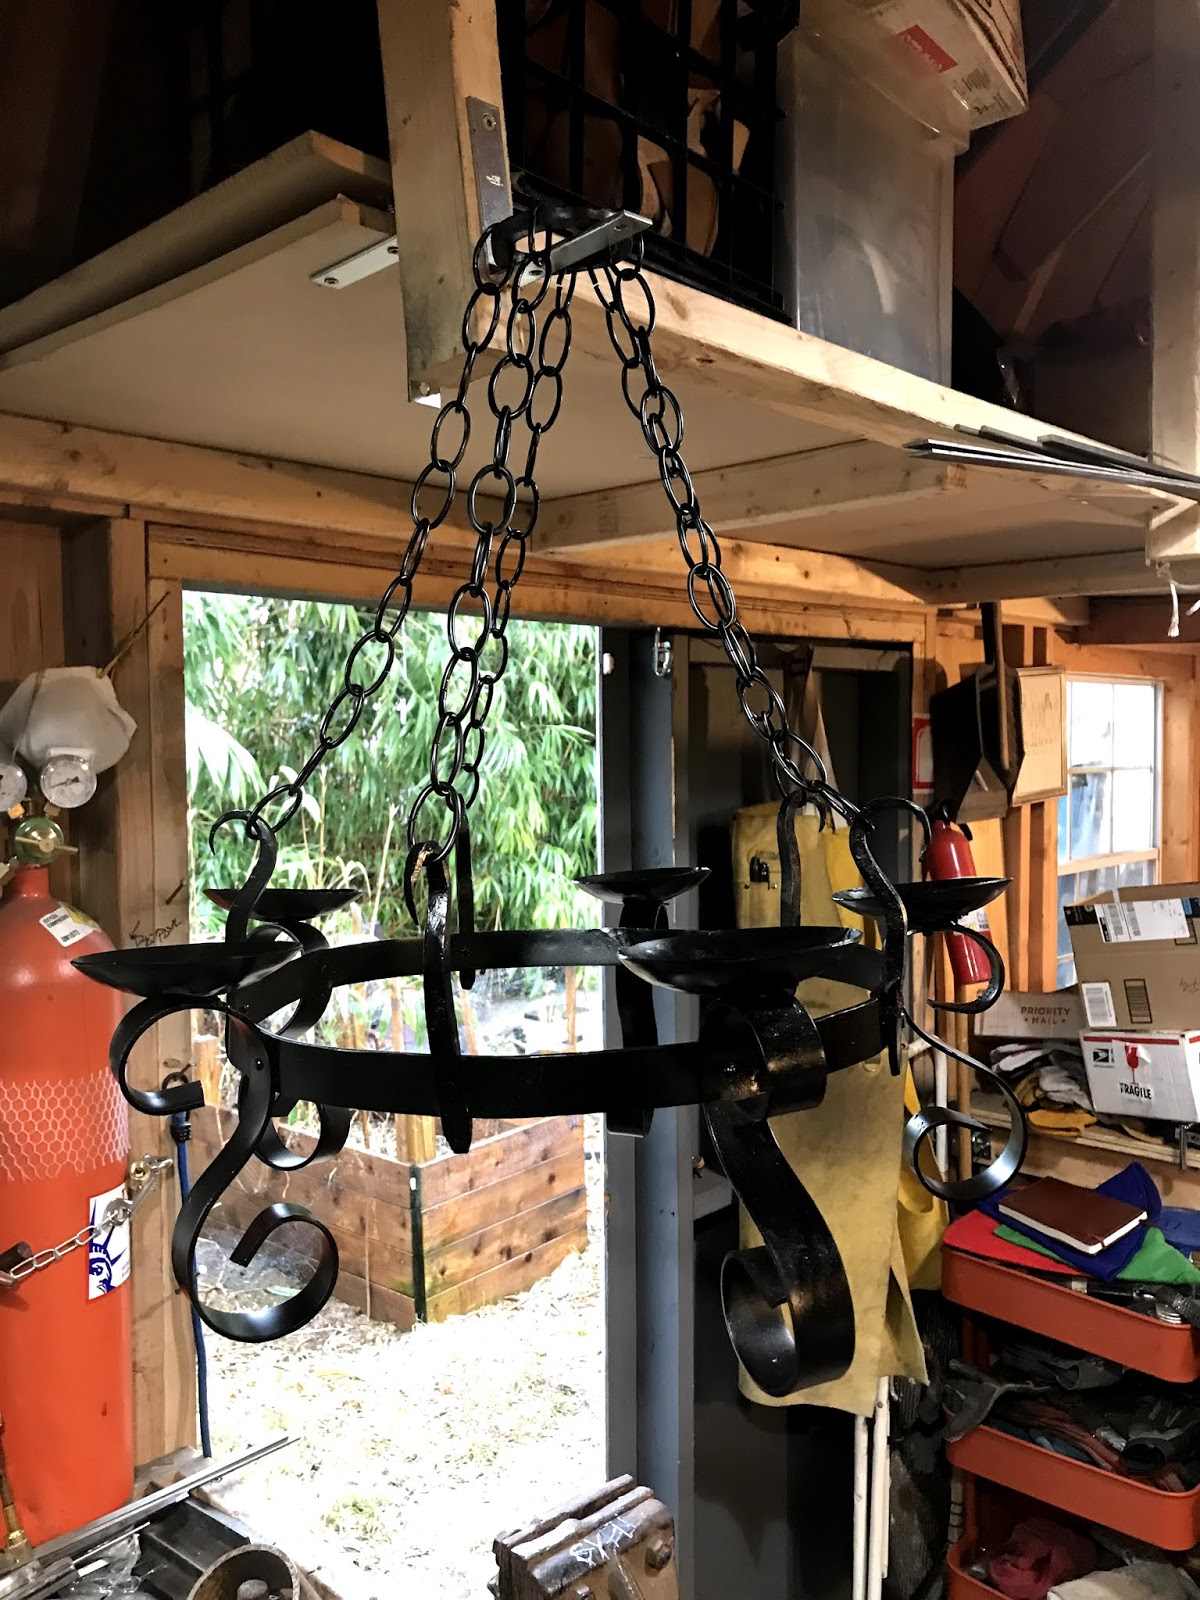
So I have been wanting to try making a larger project and something decorative. So i had the idea of making an oil lamp chandelier. About two years ago we swapped all of our candles for oil lamps in our main pavilion at Pennsic. We never found a good alternative for a hanging oil lamp chandelier, so
i decided to make one. I had an idea of the design I thought would be useful and relatively evocative of a period design. 

This particular design was going to force me to take a on a few skills which i have been working on but have not yet mastered. Scroll bending can be quite a bear, especially if you want them all too be the same size. I thought i has solved this problem by buying scroll bending jig for the shop. Apparently this jig is less than happy bending stick over a half inch wide. So while i got a basic scroll from the jig i had to fix them all on the anvil. 

The next obstacle was forging the ring in my gas forge which is not really meant for forging something that large. Then creating the ring itself. So i heated the steal up one section at a time and lacking any sort of circle jig of the correct size, we (my assistant and I) wrapped it around the anvil stump which was mostly round. Once it was close to round and closed i used an acetylene torch to heat the rough spots and round them out on the anvil. 

Next came the receptacle cups.. I started with 6 inch stainless steel discs. I heated them up in the forge and using a swage Master Danr had made out of an oxygen tank, I formed the discs into cups.

The hooks were made from 1017 mild steel. As was the hanging ring which I forged and welded shut. 

Once all the pieces were fabricated, assembly would have been easier with two people. That being said i learn a few lessons with regards to riveting multiple pieces of oddly shaped metal together. Firstly build a jig. Build two jigs if necessary. It would have gone faster and cleaner if I had the right jig to rivet against. All in all the pieces went together as planned. 

I'm pretty happy with the end result, though I know I could have done so much better and I will on version #2. 


Monday, January 7, 2019

What To Do With That Pesky Horn

A Horn Holder of a Different Color (shape).

So i have been using the same drinking horn since my second year in the SCA, roughly 19 years ago. I love this horn, I have never found one with same dimensions that fit so well on my belt and hand. The problem is where do you put it when you have liquid in it that you have not yet consumed? 

I had seen a few options most of which required the horn to be placed in some kind of cradle horizontally. That did not work for me for a number of reasons. 
1. It takes up too much real estate on the table. 
2. It's ugly.
3. It's ugly.
So I decided to tackle the issue on my own as all good viking blacksmiths would do. I wanted something that would hold the horn upright so all the liquid would remain in the horn. I also wanted it to be of a design the would work with almost any standard SCA type horn. After a few attempts I settled on the design above. It is versatile, works with virtually any horn and is as much a piece of art as a useful implement.  For those with a larger horn, the horn holder is scalable, as seen with this gigantic horn from Canada.


But wait there is more. Not only is it scalable but it is mountable as requested by a friend of a friend.


Sunday, January 6, 2019

A Royal Commission


We had the joy of  merchanting in the easy bake oven that was EK50. It was a lovely event, especially when you choose to bring a forge with you. In the course of our first day there I had the unmitigated pleasure of running into my good friend Duke Rurik. He was in turn showing the King of Aethelmearc around the merchant area. The king was looking for an anniversary gift for his wife; which was the following day. I know royalty can be busy and things can fall through the cracks.

His Grace brought the King to my booth and he asked me if I could make a small blade for his wife, the Queen of Aethelmearc. 

EK50 was a bit of a question mark for us and we did not know what to expect, so we brought a little of everything except knife making materials or tools. We figure to do mostly blacksmithing and some commissions (which we did a number of) nothing to make a fine blade nor the tools to make one. However not being one to say no to royalty, and the idea of a knife as an anniversary gift made my heart go pitter patter, I said yes of course!

The design we decided on was a small scramasax. I knew he needed it by the next afternoon. We agreed on a price and I got to work. This was about four in the afternoon on Friday. The only steel I had to work with was a high carbon railroad spike I brought just in case I had time to start on a spike knife.
I also brought no grinders except for our angle grinder we use to cut steel with.

So i spent the next three hours hammering this spike down to the size blade shown in the picture. I normalized it  and let it sit until the morning. On the way back to our hotel I stopped at Lowes and picked up some grinding wheels and sand paper to finish the knife in the morning . I also picked up a small bucket and some vegetable oil so I could quench harden the knife.

The next morning I oil quenched the knife and hand sanded the finish with various grits of sand paper. The one positive was that the king wanted to put his own handle on the knife so all I had to do was finish the blade. I used the angle grinder to put in a rough edge and then 400, 800, and 1200 grit to hone the edge sharp, I stropped it  on my shop apron and the thing was ready jut as he came to get it.

I believe he liked it based on his smile and many thanks. It was definitely a fun and slightly stressful project.


Norse Era Slide Lock and Hinges This is a project I have been wanting to take on for a very long time. So when my  Laurel suggested I make a...